

The definitive guide to using Docker as a local development environment (part 2)
This article assumes you have read part 1. If you haven’t yet, make sure to read it first.
In this part we will focus on the following points :
- How to setup a database in your development environment?
- How to open more than 1 terminal instance?
1. How to setup a database in your development environment?
Having a sandboxed web server is fine, but most of the time it relies on a database for persistence. Let’s see how to create a MongoDB container.
Doing things manually
Now you know how things go: google install mongodb ubuntu and add the steps to the Dockerfile :
docker-compose.yml:
db:
  build: .
  volumes:
    - .:/db
  ports:
- '27017:27017'Dockerfile:
FROM ubuntu:latest

RUN apt-key adv --keyserver hkp://keyserver.ubuntu.com:80 --recv EA312927
RUN echo "deb http://repo.mongodb.org/apt/ubuntu "$(lsb_release -sc)"/mongodb-org/3.2 multiverse" | sudo tee /etc/apt/sources.list.d/mongodb-org-3.2.list

RUN apt-get update
RUN apt-get install -y mongodb-org

# etc.
Then run docker-compose build and done, right? Wait…
The better way: use the directory
While the above would eventually work, this is definitely not the docker-way of doing this. The great thing about Docker is that besides offering a lightweight virtualbox, it also provides access to a huge directory of setup scripts: the DockerHub.
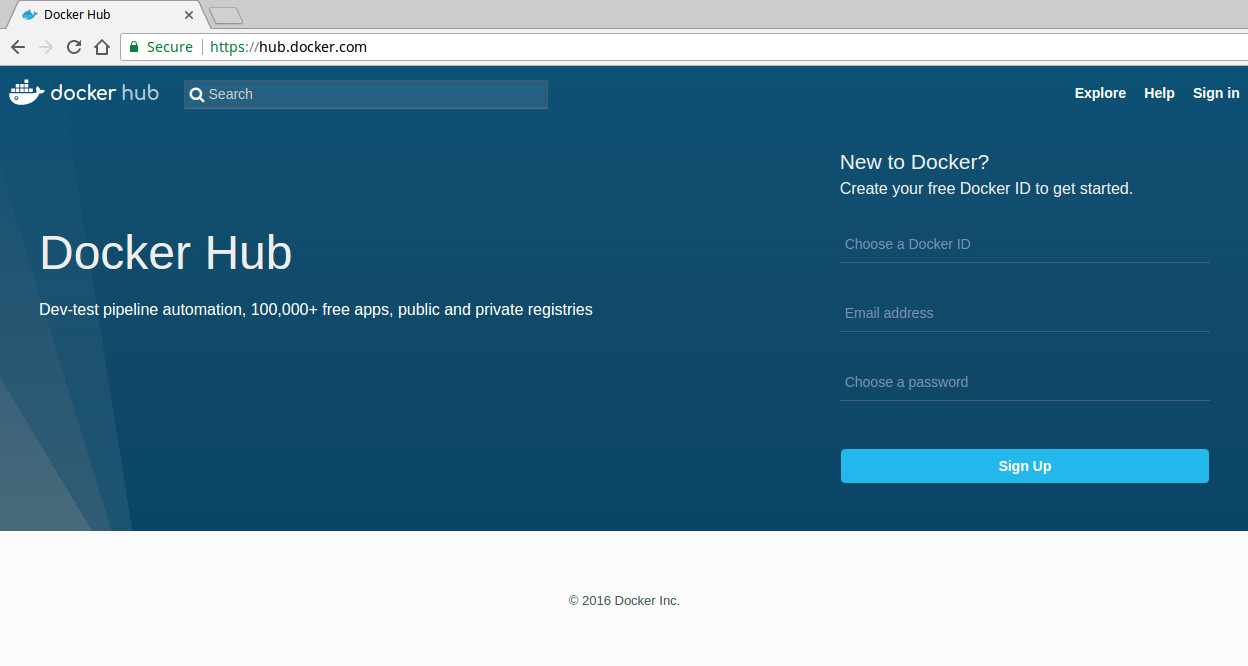
There you will find all the Docker images that the community accepted to share. It works like Github: if your image is meant to be public (= open source) then hosting is free, if it needs to be private, you will be charged a fee. In our case, we simply need to download an official image so no registration is required.
No wonder that you will find several that setup MongoDB. There is even an official one.
So you can enter the MongoDB docker using the following docker-compose.yml:
image: mongo
ports:
  - '27017:27017'
And type docker-enter. But is it really what you want to do?
Connect Mongo to your Node Docker
Most of the time, what you need is the database server to remain unchanged, and simply let your server connect to it, right?
This is where docker-compose really shines. Go back to your app docker-compose.yml and add the following:
app:
  build: .
  script: node index.js # Added
  volumes:
    - .:/app
  ports:
    - '3000:3000'
  links:
    - db
db:
  image: mongo
You can now run docker-enter and see what is going on:
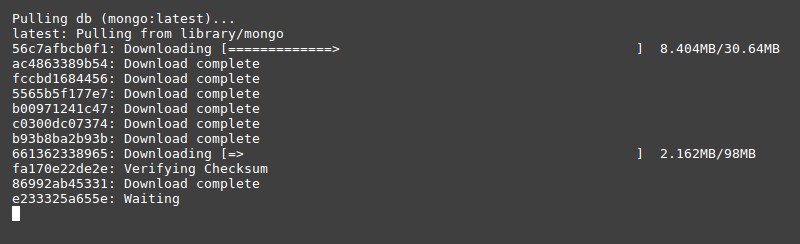
The Mongo Docker gets pulled because it is not yet present locally. Once it is done, yai, you are inside a virtual machine with NodeJS installed on it and a MongoDB connected to it.
This is great! But before we continue, can’t you think of some improvement we could make on the app Dockerfile?
Yes! You are correct: instead of installing manually NodeJS, why not using the official Node Docker, just like we did for the Mongo one?
Let’s edit our Dockerfile:
FROM node:latest # instead of ubuntu:latest + installing NodeJS

WORKDIR /app
ADD package.json .
RUN npm install
Now you’ll have to rerun docker-compose build (otherwise the previous version will be used) and then docker-enter. You are getting good! :)
Accessing Mongo from you app
I have told you Mongo is connected to your app, but until now you mostly had to trust me about this. How do I check that?
Try typing printenv:
$ printenv
DB_1_PORT_27017_TCP_ADDR=172.17.0.2
NODE_VERSION=8.0.0
DB_ENV_MONGO_PACKAGE=mongodb-org
HOSTNAME=9befb8f7bfe7
DB_NAME=/test_web_run_1/db
DB_ENV_GPG_KEYS=0C49F3730359A14518585931BC711F9BA15703C6
DB_PORT_27017_TCP=tcp://172.17.0.2:27017
TERM=xterm
DB_PORT=tcp://172.17.0.2:27017
TEST_DB_1_ENV_GOSU_VERSION=1.7
TEST_DB_1_PORT_27017_TCP_PROTO=tcp
DB_ENV_MONGO_VERSION=3.4.4
DB_ENV_GOSU_VERSION=1.7
NPM_CONFIG_LOGLEVEL=info
DB_PORT_27017_TCP_PORT=27017
DB_1_PORT_27017_TCP_PROTO=tcp
DB_1_ENV_MONGO_PACKAGE=mongodb-org
TEST_DB_1_ENV_GPG_KEYS=0C49F3730359A14518585931BC711F9BA15703C6
TEST_DB_1_PORT_27017_TCP=tcp://172.17.0.2:27017
DB_1_PORT=tcp://172.17.0.2:27017
TEST_DB_1_ENV_MONGO_MAJOR=3.4
PATH=/usr/local/sbin:/usr/local/bin:/usr/sbin:/usr/bin:/sbin:/bin
DB_1_ENV_MONGO_VERSION=3.4.4
DB_1_PORT_27017_TCP_PORT=27017
PWD=/app
DB_ENV_MONGO_MAJOR=3.4
DB_PORT_27017_TCP_PROTO=tcp
TEST_DB_1_PORT_27017_TCP_PORT=27017
SHLVL=1
HOME=/root
TEST_DB_1_ENV_MONGO_PACKAGE=mongodb-org
YARN_VERSION=0.24.6
TEST_DB_1_PORT_27017_TCP_ADDR=172.17.0.2
DB_PORT_27017_TCP_ADDR=172.17.0.2
TEST_DB_1_ENV_MONGO_VERSION=3.4.4
DB_1_ENV_MONGO_MAJOR=3.4
DB_1_NAME=/test_web_run_1/db_1
DB_1_ENV_GPG_KEYS=0C49F3730359A14518585931BC711F9BA15703C6
DB_1_PORT_27017_TCP=tcp://172.17.0.2:27017
TEST_DB_1_NAME=/test_web_run_1/test_db_1
TEST_DB_1_PORT=tcp://172.17.0.2:27017
DB_1_ENV_GOSU_VERSION=1.7
_=/usr/bin/printenv
Ouch, that’s a lot of things. Don’t worry we don’t need it all. What interests us is the Mongo IP and port, respectively 172.17.0.2 and 27017.
How to bring this into NodeJS? You already know how to do this I’m sure:
$ npm install mongodb --saveInspired from the MongoDB doc, edit your index.js this way:
const express = require('express')
const app = express()

const MongoClient = require('mongodb').MongoClient

// Connection URL
const url = `mongodb://${process.env.DB_PORT_27017_TCP_ADDR}:${process.env.DB_PORT_27017_TCP_PORT}/app`

MongoClient.connect(url, function(err, db) {
  console.log("Connected successfully to server")
})

app.get('/', function (req, res) {
  res.send('Docker is great!')
})

app.listen(3000, function () {
  console.log('Example app listening on port 3000!')
})
And try it:
$ node index.js
Example app listening on port 3000!
Connected successfully to server
Persist the data
Docker containers are meant to be disposable. Wipe and rebuild’em as often as you want! Just like softwares: when you open your browser, your photo editor, the calculator, or any software, it starts and then live until being closed. The only things that remains after this lifecycle are files.
Well in the application world, the server is the software, and the database is the file: you want to make it persist so that you have to signup in your local environment each time you want to work with it.
There is a solution to achieve this: your working directory is what remains between docker executions, your source code. Why not also set the database content there?
Let’s configure it for the above Mongo DB:
$ mkdir data # Or whatever location that makes sense to youAdd this folder to your .gitignore otherwise you will commit all your database content to your source code
dataAnd in docker-compose.yml, add the volumes entry to the db block that matches the location of the MongoDB content:
app:
  build: .
  script: node index.js # Added
  volumes:
    - .:/app
  ports:
    - '3000:3000'
  links:
    - db
db:
  image: mongo
  volumes:
    - ./data:/data/db
Unfortunately there is not 1 solution for all databases since each database system stores the data at different location. To find the solution for your DB simply google where is data stored in <DB Name> or how to make <DB Name> data persist docker and you will find it.
Examples:
- Postgresql:
/var/lib/postgresql/data - MongoDB:
/data/db - MySQL:
/var/lib/mysql
2. How to open more than 1 terminal instance?
So I got a server with its persistant database running. Fine, but that’s not all I need when I work locally. Most of the time, I also need to run scripts, to watch for files, open a console etc. So I need another terminal. Without stopping the server, let’s open a new terminal tab and go for:
$ docker-enter
ERROR: Cannot start service app: driver failed programming external connectivity on endpoint project_app_run_17 (4d8195c447cc4298c07f76488b9310b6d29430ecdf0f866befe2fb6816b3aa11): Bind for 0.0.0.0:3000 failed: port is already allocated
Ouch doesn’t work. Why? Well message is pretty clear: the port 3000 is already allocated to your other docker instance. That’s when our second alias comes into play. Try typing instead:
$ docker-enter-again # Same as `docker-enter`, but without the `--service-ports` flag.In there, you will be able to configure every thing you need: your webpack build, run the beautiful rails console, resize your images etc.
Pro-tip: You need to be aware that the context of this new container does not share context with the server one. They both start in the state of the last build. It means if you run apt-get install vim in an instance, it won’t be available in another one. As mentionned above, the only thing that is shared is the content of the shared folder: your app working directory.
Final word (for now)
From this, you should have several keys to being able to work locally with docker. If you are having some trouble, please comment this article and I will definitely help you around. If some regular questions arise, I shall edit my article or write a third part. Docker is a huge project, there are tons of possible ways to use it, so be aware that this content was simply introductory and very opinionated from my usage.
Some docker experts might even consider this is non-sense, as this was not what Docker was created for. And so what? I have been surprised of the few litterature available on the topic and this is what took me to write this, after some time practicing by myself.
Finally, let me suggest you a last alias:
alias docker-clean="docker ps -a | grep 'Exited\|Created' | cut -d ' ' -f 1 | xargs docker rm"Why?
Because despite the --rm option that is supposed to remove the instance after it has been run, sometimes you won’t exit things correctly, and some instances happen to remain ghosts on your laptop, docker-clean will remove those.
$ docker ps -a
CONTAINER ID        IMAGE               COMMAND                  CREATED             STATUS                     PORTS                                         NAMES
cbcd659cf8a8        webiteasy_web       "/bin/bash"              12 minutes ago      Created                                                                  webiteasy_web_run_17
e560889ce3b9        webiteasy_web       "/bin/bash"              25 minutes ago      Up 25 minutes              4000/tcp, 0.0.0.0:3000->3000/tcp, 35729/tcp   webiteasy_web_run_16
b6c16dabdc26        copass_web          "/bin/bash"              2 hours ago         Created                                                                  copass_web_run_1
f4fb9a6fda29        mdillon/postgis     "docker-entrypoint..."   2 hours ago         Up 2 hours                 0.0.0.0:32768->5432/tcp                       copass_db_1
acd1631890fe        webiteasy_web       "/bin/bash"              18 hours ago        Created                                                                  webiteasy_web_run_15
0fa3afb6d91d        webiteasy_web       "/bin/bash"              4 days ago          Up 4 days                  4000/tcp, 35729/tcp                           webiteasy_web_run_14
9ea333c98e6f        webiteasy_web       "node local.js"          4 days ago          Exited (137) 2 hours ago                                                 webiteasy_web_1
fb23ecb83d3b        webiteasy_web       "/bin/bash"              4 days ago          Exited (0) 4 days ago                                                    webiteasy_web_run_13
887fbbad4c87        webiteasy_web       "/bin/bash"              4 days ago          Exited (137) 4 days ago                                                  webiteasy_web_run_12
5fbe10194c42        webiteasy_web       "/bin/bash"              4 days ago          Exited (0) 4 days ago                                                    webiteasy_web_run_11
091e79694da3        webiteasy_web       "/bin/bash"              4 days ago          Exited (137) 4 days ago                                                  webiteasy_web_run_10
3b6590de6b9d        webiteasy_web       "/bin/bash"              5 days ago          Exited (0) 4 days ago                                                    webiteasy_web_run_9
74b7def656e7        webiteasy_web       "/bin/bash"              5 days ago          Exited (137) 4 days ago                                                  webiteasy_web_run_8
9ecc07d08634        webiteasy_web       "/bin/bash"              5 days ago          Created                                                                  webiteasy_web_run_7
32bbbe9c03f0        mongo               "docker-entrypoint..."   5 days ago          Exited (0) 4 days ago                                                    test_db_1
e1d35ed19d30        webiteasy_web       "/bin/bash"              5 days ago          Exited (137) 5 days ago                                                  webiteasy_web_run_6
6a9e1606d119        webiteasy_web       "/bin/bash"              5 days ago          Created                                                                  webiteasy_web_run_5
851570a29cba        haskellchess_web    "runhaskell /haske..."   6 days ago          Exited (1) 6 days ago                                                    haskellchess_web_1
74b47d026757        webiteasy_web       "/bin/bash"              6 days ago          Exited (0) 5 days ago                                                    webiteasy_web_run_4
3e3c4d10e35a        85e96f61d536        "/bin/sh -c 'apk a..."   6 days ago          Exited (1) 6 days ago                                                    zealous_dijkstra
a79dc48005d8        bd38058e5097        "/bin/sh -c /srv/j..."   6 days ago          Exited (127) 6 days ago                                                  youthful_shirley
c09a63689135        bd38058e5097        "/bin/sh -c build.sh"    6 days ago          Exited (127) 6 days ago                                                  hardcore_spence
f8029d9226e1        haskell:latest      "/bin/bash"              7 days ago          Exited (137) 7 days ago                                                  haskellchess_web_run_1
$ docker-clean
cbcd659cf8a8
b6c16dabdc26
acd1631890fe
9ea333c98e6f
fb23ecb83d3b
887fbbad4c87
5fbe10194c42
091e79694da3
3b6590de6b9d
74b7def656e7
9ecc07d08634
32bbbe9c03f0
e1d35ed19d30
6a9e1606d119
851570a29cba
74b47d026757
3e3c4d10e35a
a79dc48005d8
c09a63689135
f8029d9226e1$ docker ps -a
CONTAINER ID IMAGE COMMAND CREATED STATUS PORTS NAMES
e560889ce3b9 webiteasy_web "/bin/bash" 25 minutes ago Up 25 minutes 4000/tcp, 0.0.0.0:3000->3000/tcp, 35729/tcp webiteasy_web_run_16
f4fb9a6fda29 mdillon/postgis "docker-entrypoint..." 2 hours ago Up 2 hours 0.0.0.0:32768->5432/tcp copass_db_1
0fa3afb6d91d webiteasy_web "/bin/bash" 4 days ago Up 4 days 4000/tcp, 35729/tcp webiteasy_web_run_14
Read Further
")
The definitive guide to using Docker as a local development environment (part 1)

Learn how to setup your local server within a Docker
Continue →
The day I stopped using Heroku
Heroku has been a great service, but also has too much control on my work.
Continue →